

How To Make A Light Box For Drawing
How To Build A Quick DIY Light Box
Make this perfect low-cal box for sketching in an afternoon. The all-time part is yous don't have to exercise any electrical work, because information technology works with off-the-shelf LED strips. Learn how to make a calorie-free box for tracing with these piece of cake to follow plans.
![]() Fourth dimension
Fourth dimension
A few hours
![]() Complexity
Complexity
Beginner
Introduction
With just a couple hours, some 1x4, 1/iv-in. plywood, some plexiglas, and a cheap LED light strip, you can have a bootleg light box for tracing and art projects. Permit'due south get started!
Tools Required
Materials Required
- i/4-in. Plywood (2 x iv ft.)
- 1x4 lath (viii ft.)
- Foil tape
- Frosted Plexiglas (18 x 24 in.)
- Plug-In LED Tape Low-cal (10 ft.)
Cutting Listing

Project step-by-stride (vii)
Step one
Rip dadoes into the sides

Cut iii/viii-in. dadoes into 1x4 stock, 1/four-in. from each edge.
Footstep 2
Cut sides to length
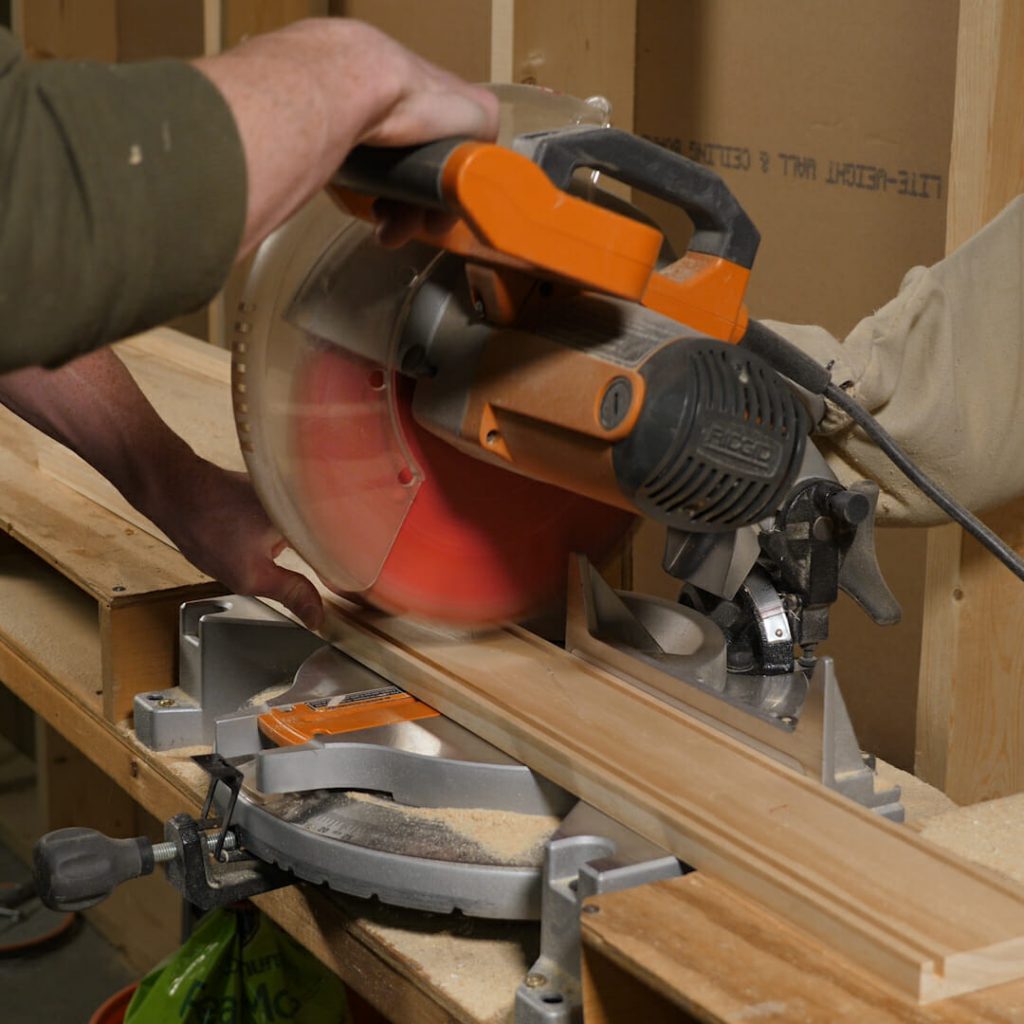
Cut the 1x4 board into two 24-iii/4-in.-long boards and two 17-1/4-in. long boards. Cutting the ¼-in. plywood to 18x24 in.
![]()
Step 3
Create a cogitating surface
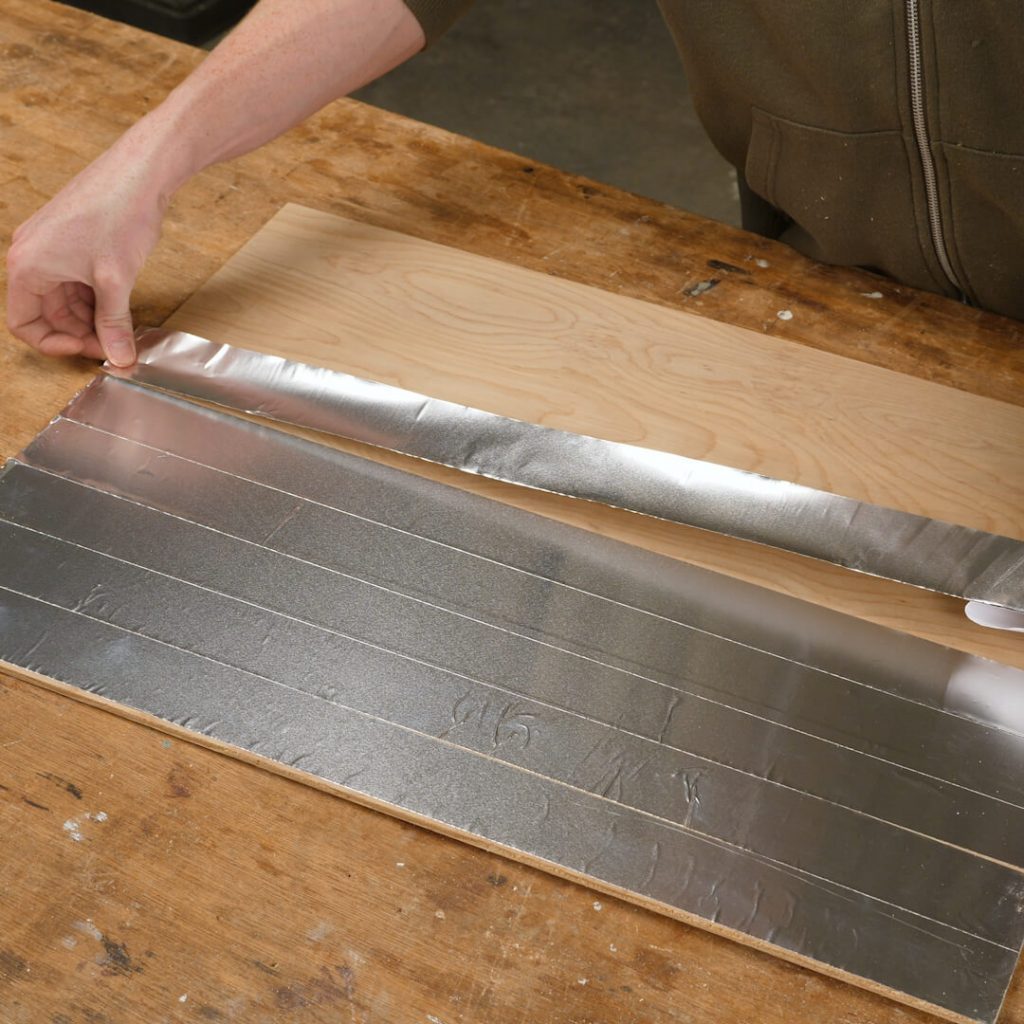
Attach the foil tape to the interior of the side boards and plywood.
Step 4
Drill the cord hole
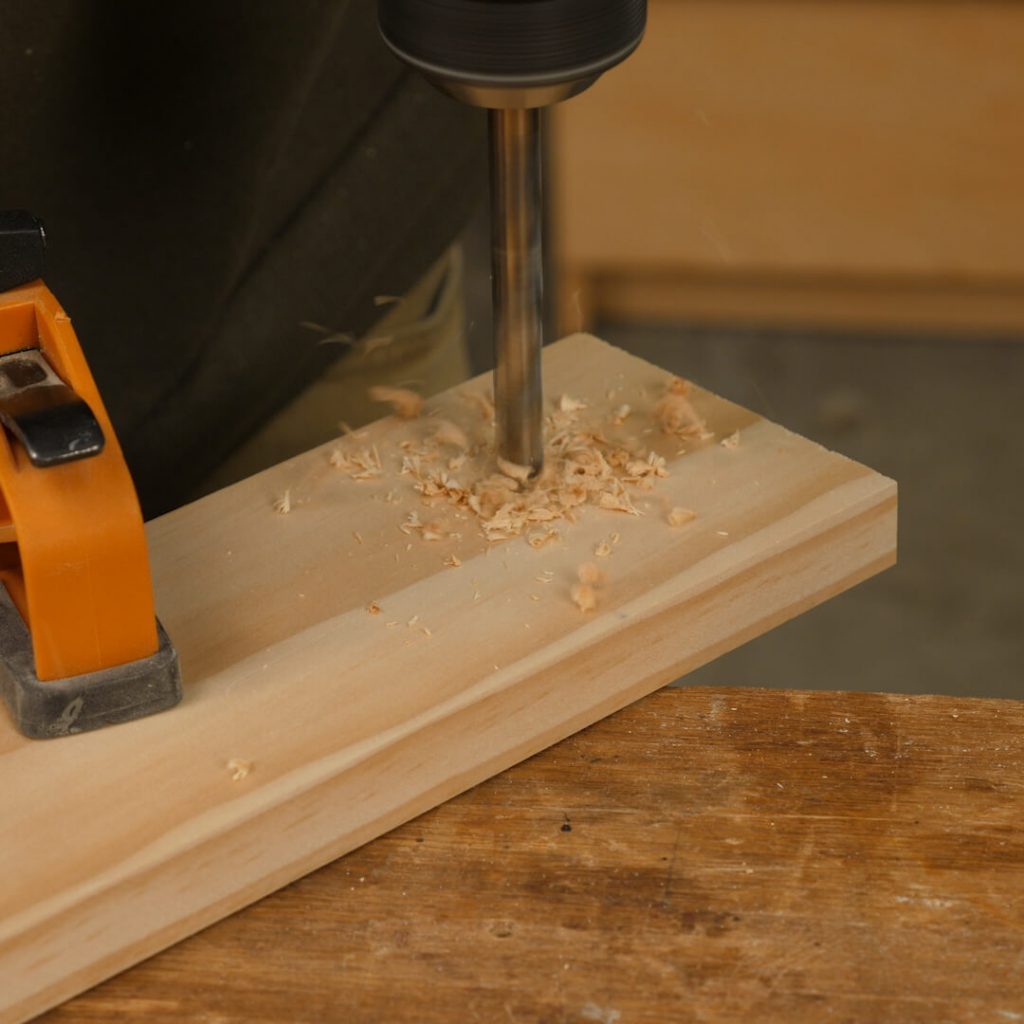
Drill a i/2-in. hole, 2 in. from the cease of one of the long sides, to feed the power string out.
Step half-dozen
String the lights
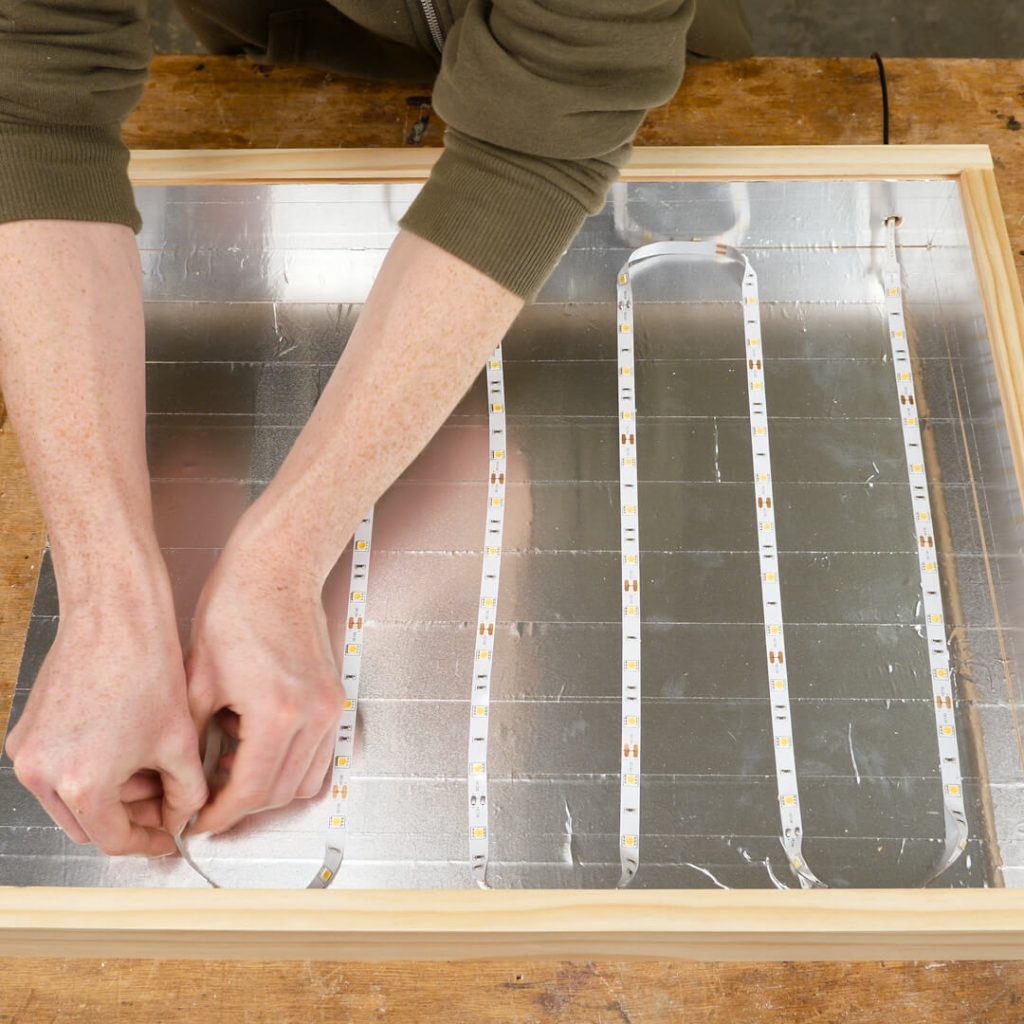
Tape down the LED lights to the plywood bottom and feed the end through the 1/two-in. pigsty in the side.
Step 7
Add the frosted plexiglas
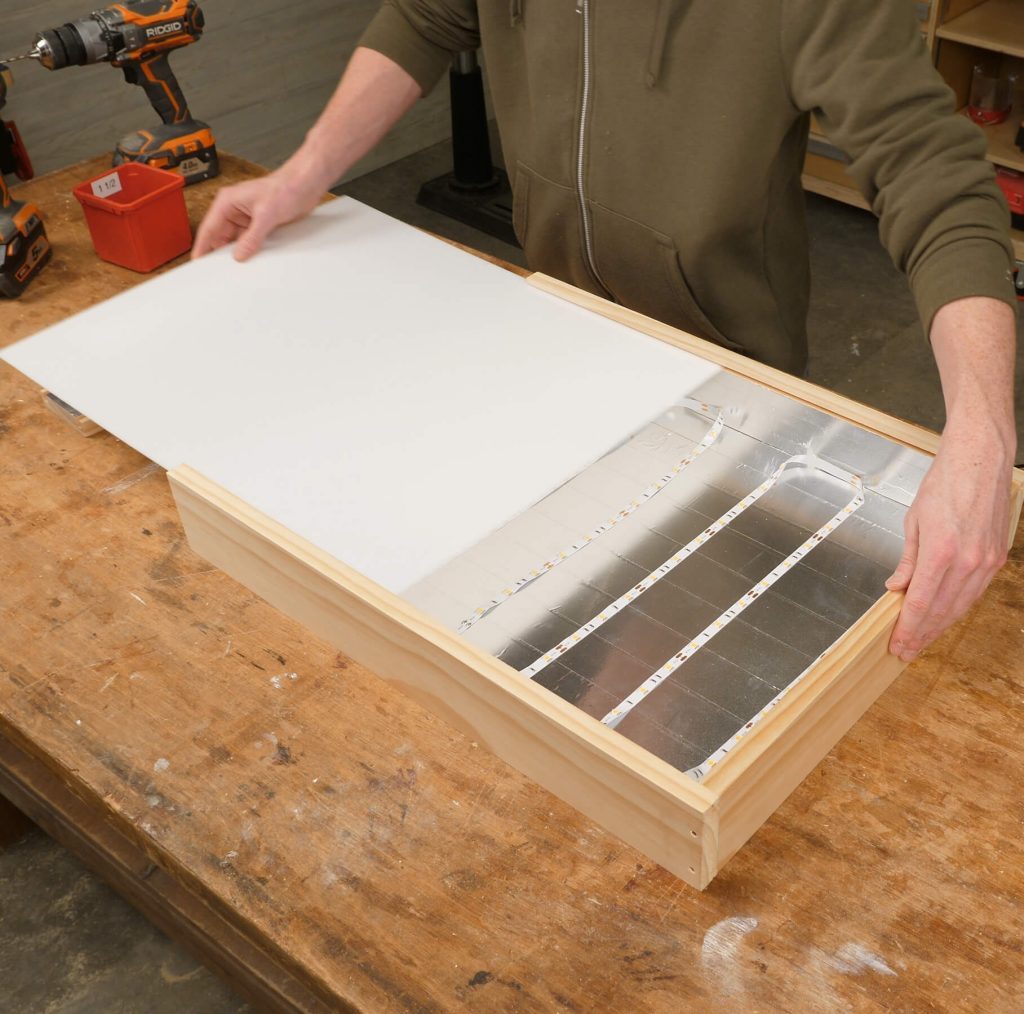
Slide in the frosted glass and fasten the last side with screws. Offset tracing!

Source: https://www.familyhandyman.com/project/quick-diy-light-box/
Posted by: ruffinhiscambeste.blogspot.com
0 Response to "How To Make A Light Box For Drawing"
Post a Comment